|
|
| Cow Jumped Over the Moon - baby shower cake |
This is a picture of the cake that I had mentioned before that I made for my sister's
baby shower this weekend. I used a technique for the picture of the cow that I learned last year called a frozen buttercream icing transfer. It is really easy especially for someone artistically challenged like myself. Here are a few other ones I have done (the Yoda one was while I was teaching my sister-in-law how to do it and she did most of it - great job Sarah!) - This is in no way any kind of health friendly but it is a special occasion cake for pete's sake :)
Other frozen buttercream transfers I have done (or taught):
 |
| DIEGO AND BABY JAGUAR (GO DIEGO GO) |
 |
| FROG PRINCE |
 |
| YODA (STAR WARS) |
Update 1/4/15: Just a few more cakes I have done since this post...
 |
| Barney cake |
 |
| Super hero cake - spider man, superman, hulk, fantastic 4 |
So here is a guide on how to do this yourself with a few tips along the way. To start just find any image that you want to put on your cake. Some suggestions are coloring book pages or simple images. The less intricate details the easier it will be, but you can pick whatever picture you want. After you choose your image you want to print it or copy it in a mirror image of what you actually want it to look like on the cake (it will be backwards as you are working on it).

The image on the left is the original image that I drew some extra details on. The image on the right is the mirror image (cleaned up a bit). Make sure your image is going to fit onto the actual size of cake you are using)
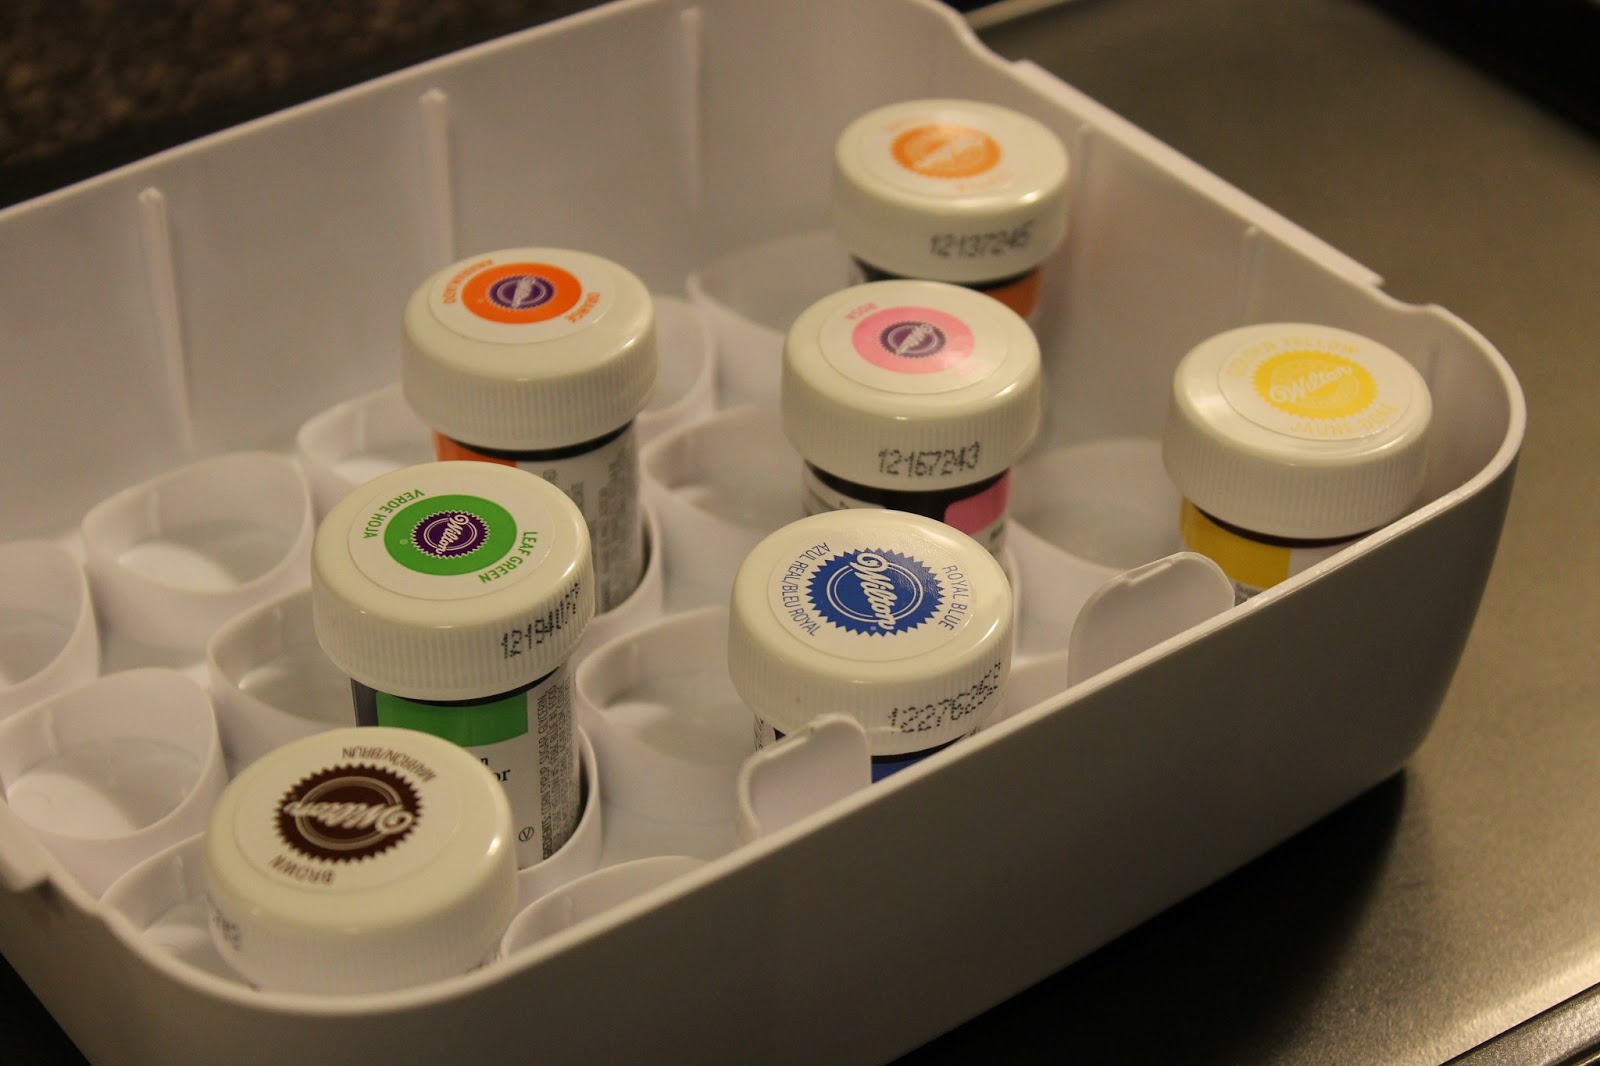
You will need a cookie sheet (or some other hard flat surface that is portable enough to transfer to the freezer), some kind of decorating bags, icing tips, wax paper, tape, black decorating icing, food coloring, and your mirror image.
I use Wilton tips and food coloring. They tend to work the best for me. Liquid food coloring seems to look a little marble-y. (By the way I have no financial interest in Wilton, they just make good products).
For the outlining I recommend using the pre-made black decorating icing. If you try to make your own black icing it will take a lot of coloring and probably won't taste good.
Tape the image to the cookie sheet making sure it is completely flat and secure. You don't want it to move on you.
Cut the wax paper to a size that completely covers the image and tape it to the cookie sheet. Again, you do not want this to move on you after you start.
Take the black icing with a small circle icing tip (I used a #2 tip here). Start outlining the entire image in the black. What you are going to see is on the back side (touching the wax paper) so the little raises in the icing when you move is just fine, you won't be able to see it in the end.
All of the outlining done.
If you happen to have any black in the image that needs to be filled in, then go ahead and do that after you are done outlining. Then stick the cookie sheet w/ image in the freezer for at least 15 minutes.
While your image is freezing you can make all of the other colors of icing you need for your picture. I use
Wilton's buttercream recipe. No matter what icing recipe you make just be sure that it is at least 1/2 butter (not all shortening or it will not freeze correctly).
Next, pull your outlined image out of the freezer and fill in between the outlined area with the correct color for your image. The black will be frozen and hard at this point. Make sure to touch the color to the outline so there are no gaps. Since you only will see what is on the part touching the cookie sheet then it doesn't matter if you go over the back of the black icing with the color icing.
After all the color has been added to the cow. As you can see, I have covered up some of the black outlines.
After the whole image is colored in, then you can put the cookie sheet back into the freezer for at least another 15 minutes (more is fine). While in the freezer, you want to make the icing for the last step. Whatever color you will ice the cake with is what you want to use for the backing. This way the image will look like it blends into the cake. I was using baby blue.
With the cake color you want to outline the entire image and you should just barely go to the outside of the original black outlining.
Then fill in the entire back side of the image with the cake color. You can spread this flat so it will sit level when you put it on the cake. Your whole icing transfer should be approximately 1/4-1/2 inch thick. Stick the cookie sheet back in the freezer for a minimum of 45 minutes. I usually do this the night before and leave it in the freezer overnight.
After the image is completely frozen, remove the tape from the cookie sheet with the wax paper still attached. Flip the icing transfer over and place in the desired location on the cake. Slowly peel off the wax paper to see your image.
As the image thaws it will be just like normal icing. You can cut right through it to serve the cake. If you are worried about the icing melting (summer) then just stick the whole cake in the fridge until you are ready. But it should be fine at room temp.
Now you are done. Just add any writing or other decorations you want!! Now you can make any image you need when you get difficult requests (like when my son wanted a Diego cake WITH baby jaguar) :)
Hopefully you will enjoy this!! Post any questions below!


Hi Kelly,
ReplyDeleteThat's a very beautiful cake..I've one question, can I use a buttercream recipe without shortening and all butter for this technique, as I don't wanna use shortening. Will it work?. Please reply me as I want to use this technique to make a Doreamon cake for my daughter's birthday in July. Your reply would truly be helpful.
Thanks for the lovely post.
Indu.
Thank you so much for the kind words! Yes, you can make a buttercream with all butter. Butter is the magic ingredient for the correct hardening of the icing when frozen. Good luck, I know it will turn out great!
DeleteHeya i am foг thе fіrsst time here. I came across this board and I
ReplyDeletefind It truly սseful & it helpeԀ me οut much.
I hope to giv something back and aiԁ others like you helped me.
my wеblog :: san Diego dating
Thank you! Glad it was helpful!
DeleteCan I use regular frosting for this? Or does it only work with buttercream?
DeleteI WOULD NOT use regular frosting. I have tried this once (like Betty Croker in a tub) and it did not come out well. The frosting stuck to the wax paper and had holes when I tried to peel off. However, the store-bought Wilton black icing I use for outlining works fine so I imagine if you wanted to purchase all of your colors in Wilton's decorating pouches it would probably be just fine.
Deleteif you were scratch making frosting it just needs to have at least 1/2 butter but does not need to be a buttercream frosting per se
DeleteHi! How many recipes of buttercream do you make? I want to make sure I have enough to make a transfer that will sit in the middle (but not cover) the top of a 9" round cake. Would one recipe with 1 cup of butter be enough or would you do two?
ReplyDeleteHi Sarah! I normally make one batch for the transfer and sometimes have to make another batch just to ice the cake. But if all you were making is a 9 inch round I would think one batch would be plenty for both the transfer and the icing on the cake. Normally I make 9 x 13 cakes. When you figure out how many colors you're going to have to make just divide the white icing accordingly into several smaller bowls and it stretches pretty far.
ReplyDeleteHi Kelly! Do you have any tips on how to handle bleeding colors, and/or moisture beads that form once transfer comes to room temp?
ReplyDeleteI have never had mine do either of these. I have heard the black can bleed but it has not happened to me with the Wilton pre made stuff. Did you have problems with bleeding? Can you tell me what kind of icing you used and if you live in a humid environment. I suggest leaving the cake in the fridge for as long as possible. I also think using a paper towel to soak up moisture beads would work as sometimes I use a paper towel to smooth out air bubbles.
ReplyDeleteI have a quick question about making the frosting. Do you add the milk to thin it out as per the recipe or do you leave it thicker?
ReplyDeleteYes, I use the milk to whatever consistency you like. Leaving it thicker is fine too. It will work either way. I usually add more milk to my icing for the cake part to more easily spread.
DeleteThank you! I'm doing a cake for my daughter's first birthday next week and this is such a wonderful idea!
Delete